Kyra

Gubba Homestead

US
en
Followers
1.1m
Average Views
1.2k
Engagement Rate
6.0%
@gubhomestead is a TikTok influencer sharing her journey of homesteading with her family. Expect DIY projects, gardening tips, adorable animals, and a taste of rural life, often with a humorous and charming twist.
Performance
Related Profiles
A post by @gubhomestead on TikTok caption: What do you think? #homesteading #homesteadinglife #fog
6.6k
2.61%
A post by @gubhomestead on TikTok caption: What would you add to the list? #homesteading #homesteadinglife
What would you add to the list? #homesteading #homesteadinglife
13.8k
4.62%
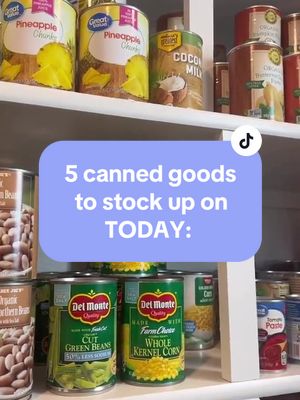
A post by @gubhomestead on TikTok caption: Stocking up on canned food is a perfect way to start buikding a food storage! #homesteading #homesteadinglife
Stocking up on canned food is a perfect way to start buikding a food storage! #homesteading #homesteadinglife
6.9k
2.7%
A post by @gubhomestead on TikTok caption: Freeze dryers are amazing! Take your leftovers and have a 30+ year food storage. They remove the moisture from food making it suitabke for long term! #homesteading #homesteadinglife
Freeze dryers are amazing! Take your leftovers and have a 30+ year food storage. They remove the moisture from food making it suitabke for long term! #homesteading #homesteadinglife
15.9k
2.09%
A post by @gubhomestead on TikTok caption: Toxin-free can be as simple as you make it! #homesteading #homesteadinglife
Toxin-free can be as simple as you make it! #homesteading #homesteadinglife
52.4k
5.1%
A post by @gubhomestead on TikTok caption: Buying groceries in bulk saves money! #homesteading #homesteadinglife
Buying groceries in bulk saves money! #homesteading #homesteadinglife
5.7k
3.15%
A post by @gubhomestead on TikTok caption: What is on your list? #homesteading #homesteadinglife
What is on your list? #homesteading #homesteadinglife
262.8k
5.2%
A post by @gubhomestead on TikTok caption: Instant pot yogurt⬇️ 1 gallon of milk (depending on Instant Pot size)  1/2 cup yogurt  Pour in your milk. Press the yogurt function. This will boil your milk to 180F. When it’s done you will let it cool to 110F then add in the 1/2 cup of yogurt. This is the culture that introduces bacteria needed for the incubation period. Put it back in the instant pot and click the yogurt function again for 8-12 hours. 8 hours for a more runny and less tangy yogurt and 12 hours for a more thick and tangy yogurt. After incubation, you can strain the yogurt to get a thicker Greek style. I didn’t do that here because my yogurt was already thick enough. Put in the fridge for 4 hours to set. After incubation is the best time to put in sweeteners or your preferred flavors.  It’s that easy to have delicious yogurt at home!  You can make homemade yogurt without the instant pot. You follow all of the same steps but on stove top then you will have to wrap the container in a towel and place it in a warm spot like an oven with the light on for 8-12 hours. You will have to maintain 110F for that period.  Have you tried this?  #homestesdinglife #homesteadlife
Instant pot yogurt⬇️ 1 gallon of milk (depending on Instant Pot size) 1/2 cup yogurt Pour in your milk. Press the yogurt function. This will boil your milk to 180F. When it’s done you will let it cool to 110F then add in the 1/2 cup of yogurt. This is the culture that introduces bacteria needed for the incubation period. Put it back in the instant pot and click the yogurt function again for 8-12 hours. 8 hours for a more runny and less tangy yogurt and 12 hours for a more thick and tangy yogurt. After incubation, you can strain the yogurt to get a thicker Greek style. I didn’t do that here because my yogurt was already thick enough. Put in the fridge for 4 hours to set. After incubation is the best time to put in sweeteners or your preferred flavors. It’s that easy to have delicious yogurt at home! You can make homemade yogurt without the instant pot. You follow all of the same steps but on stove top then you will have to wrap the container in a towel and place it in a warm spot like an oven with the light on for 8-12 hours. You will have to maintain 110F for that period. Have you tried this? #homestesdinglife #homesteadlife
1.8k
3.49%
A post by @gubhomestead on TikTok caption: What do you think?
What do you think?
4.8k
5.1%
A post by @gubhomestead on TikTok caption: Did you know this? #homesteadlife
Did you know this? #homesteadlife
4.1k
4.36%
A post by @gubhomestead on TikTok caption: Here is what I got from my butchered 1/2 beef: Soup bones, stew meat, burger, Chuck roasts, shoulder roasts, ribeyes, short ribs, skirt steak, flank steak, tri tip, sirloin, NY fillets, top round, stew meat, soup bones, and a big box of organs, bones, and scrap. Also, you usually have to request the bones, organs, and scrap or it will be re-sold or tossed! #homesteadinglife #homesteading
Here is what I got from my butchered 1/2 beef: Soup bones, stew meat, burger, Chuck roasts, shoulder roasts, ribeyes, short ribs, skirt steak, flank steak, tri tip, sirloin, NY fillets, top round, stew meat, soup bones, and a big box of organs, bones, and scrap. Also, you usually have to request the bones, organs, and scrap or it will be re-sold or tossed! #homesteadinglife #homesteading
3.7k
4.08%
A post by @gubhomestead on TikTok caption: You can discover truth for yourself. What do you think? #homesteadinglife #homesteading #selfsufficiency
You can discover truth for yourself. What do you think? #homesteadinglife #homesteading #selfsufficiency
50.1k
6.42%
A post by @gubhomestead on TikTok caption: Easy sourdough recipe⬇️ Sourdough doesn’t have to be complicated to taste amazing. Don’t compare your loaves to the loaves of professional bakers when starting out. Just aim for a successful loaf!  You can skip the fancy tools, special flours, and intimidating techniques and still bake a loaf you will be happy to eat. Easy sourdough recipe:  1/4 cup sourdough starter  1 3/4 cup warm water  2 tablespoons honey  4 cups all-purpose or bread flour  1 teaspoon of salt  Mix together the sourdough starter and warm water. Pour in the honey. With a whisk, mix in the flour until it fork a shaggy dough then knead with your hand until it has gathered all of the flour off the sides and shaped into a smoother dough. Sprinkle in the salt and lightly knead in. Let rest for 30 minutes then do your first stretch and fold. Do this 4x. Now cover and let rise on the counter for 10-12 hours. Shape your dough and you can either bake now or put in the fridge overnight. Bake at 425F for 1 hour. You can remove the lid at 30 minutes or not. Enjoy!  My suggestion is to try different things. Adjust to your kitchen and ingredients as you go!  What do you think?  #homesteadinglife #homesteadlife
Easy sourdough recipe⬇️ Sourdough doesn’t have to be complicated to taste amazing. Don’t compare your loaves to the loaves of professional bakers when starting out. Just aim for a successful loaf! You can skip the fancy tools, special flours, and intimidating techniques and still bake a loaf you will be happy to eat. Easy sourdough recipe: 1/4 cup sourdough starter 1 3/4 cup warm water 2 tablespoons honey 4 cups all-purpose or bread flour 1 teaspoon of salt Mix together the sourdough starter and warm water. Pour in the honey. With a whisk, mix in the flour until it fork a shaggy dough then knead with your hand until it has gathered all of the flour off the sides and shaped into a smoother dough. Sprinkle in the salt and lightly knead in. Let rest for 30 minutes then do your first stretch and fold. Do this 4x. Now cover and let rise on the counter for 10-12 hours. Shape your dough and you can either bake now or put in the fridge overnight. Bake at 425F for 1 hour. You can remove the lid at 30 minutes or not. Enjoy! My suggestion is to try different things. Adjust to your kitchen and ingredients as you go! What do you think? #homesteadinglife #homesteadlife
5.8k
4.43%
A post by @gubhomestead on TikTok caption: Flour vs. Wheat Berries: The Nutritional Difference Did you know that flour starts losing its nutrients almost immediately after wheat berries are ground? This happens because grinding exposes the wheat germ's natural oils to air, leading to oxidation. Key nutrients like B vitamins, vitamin E, and minerals degrade quickly—often within days to weeks. On top of that, the healthy oils in the wheat germ can go rancid, further diminishing the flour’s quality. Now consider store-bought flour. By the time it reaches your kitchen, it’s often been sitting on shelves for weeks or months, meaning much of its original nutritional value is already gone. Manufacturers try to make up for this by adding synthetic vitamins and minerals to “enrich” the flour, but let’s be honest—nothing beats the real deal. No synthetic folic acid or other sneaky additives for me, thank you very much! 😅 Wheat berries, however, are a fantastic alternative for both nutrition and long-term storage. Because they stay in their whole form, their nutrients remain intact until you’re ready to grind them. When stored properly in Mylar bags with oxygen absorbers, wheat berries can last up to 30 years. That means you’ll always have access to fresh, nutrient-rich flour whenever you need it. Grinding your own flour also means you can control the texture, from fine flour to coarse meal, giving you versatility for baking everything from bread to pastries to hearty whole-grain dishes. Plus, freshly ground flour has a richer, more vibrant flavor compared to pre-packaged flour. There are plenty of grinder options available, from hand-crank models to stand-alone appliances or even kitchen attachments. Having one in your kitchen gives you the ability to make fresh flour on demand, packed with all the goodness nature intended. Just imagine baking with all the nutrients still there! What do you think? #homesteading #homesteadinglife
Flour vs. Wheat Berries: The Nutritional Difference Did you know that flour starts losing its nutrients almost immediately after wheat berries are ground? This happens because grinding exposes the wheat germ's natural oils to air, leading to oxidation. Key nutrients like B vitamins, vitamin E, and minerals degrade quickly—often within days to weeks. On top of that, the healthy oils in the wheat germ can go rancid, further diminishing the flour’s quality. Now consider store-bought flour. By the time it reaches your kitchen, it’s often been sitting on shelves for weeks or months, meaning much of its original nutritional value is already gone. Manufacturers try to make up for this by adding synthetic vitamins and minerals to “enrich” the flour, but let’s be honest—nothing beats the real deal. No synthetic folic acid or other sneaky additives for me, thank you very much! 😅 Wheat berries, however, are a fantastic alternative for both nutrition and long-term storage. Because they stay in their whole form, their nutrients remain intact until you’re ready to grind them. When stored properly in Mylar bags with oxygen absorbers, wheat berries can last up to 30 years. That means you’ll always have access to fresh, nutrient-rich flour whenever you need it. Grinding your own flour also means you can control the texture, from fine flour to coarse meal, giving you versatility for baking everything from bread to pastries to hearty whole-grain dishes. Plus, freshly ground flour has a richer, more vibrant flavor compared to pre-packaged flour. There are plenty of grinder options available, from hand-crank models to stand-alone appliances or even kitchen attachments. Having one in your kitchen gives you the ability to make fresh flour on demand, packed with all the goodness nature intended. Just imagine baking with all the nutrients still there! What do you think? #homesteading #homesteadinglife
5.2k
4.59%

start an influencer campaign that drives genuine engagement